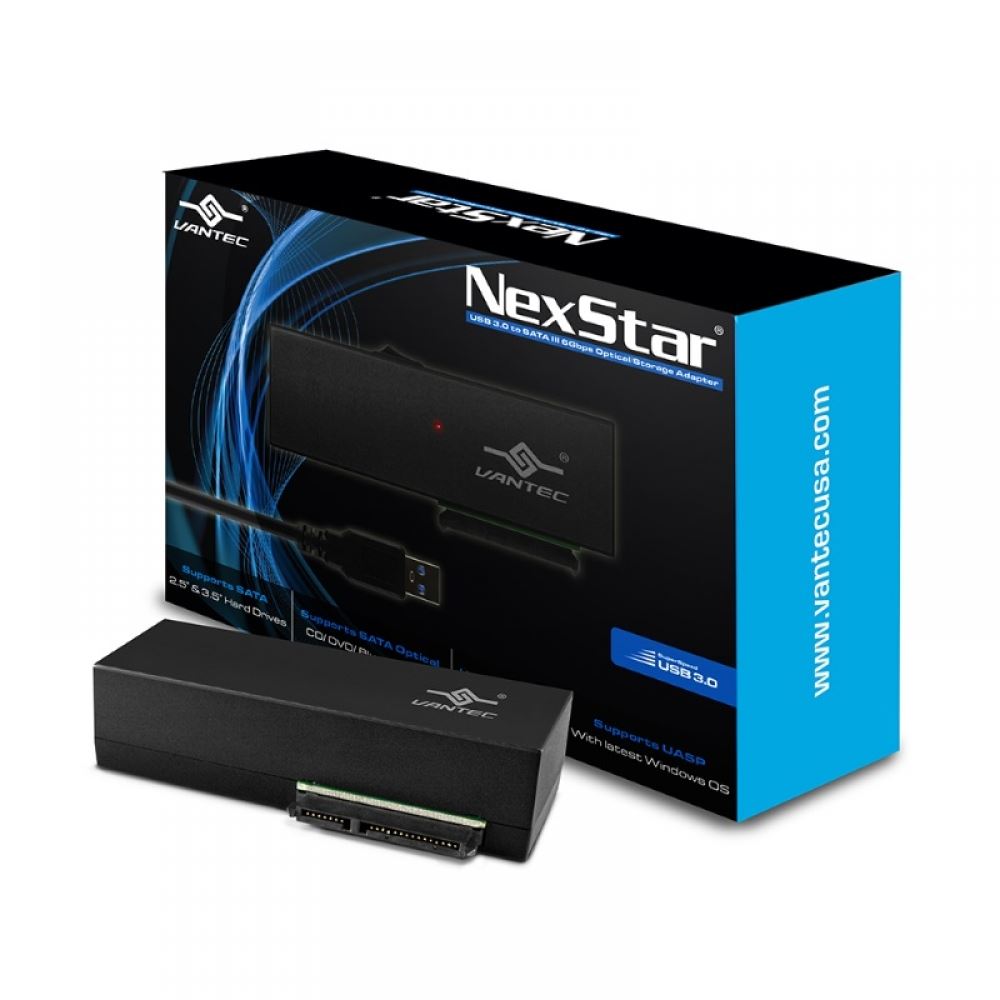
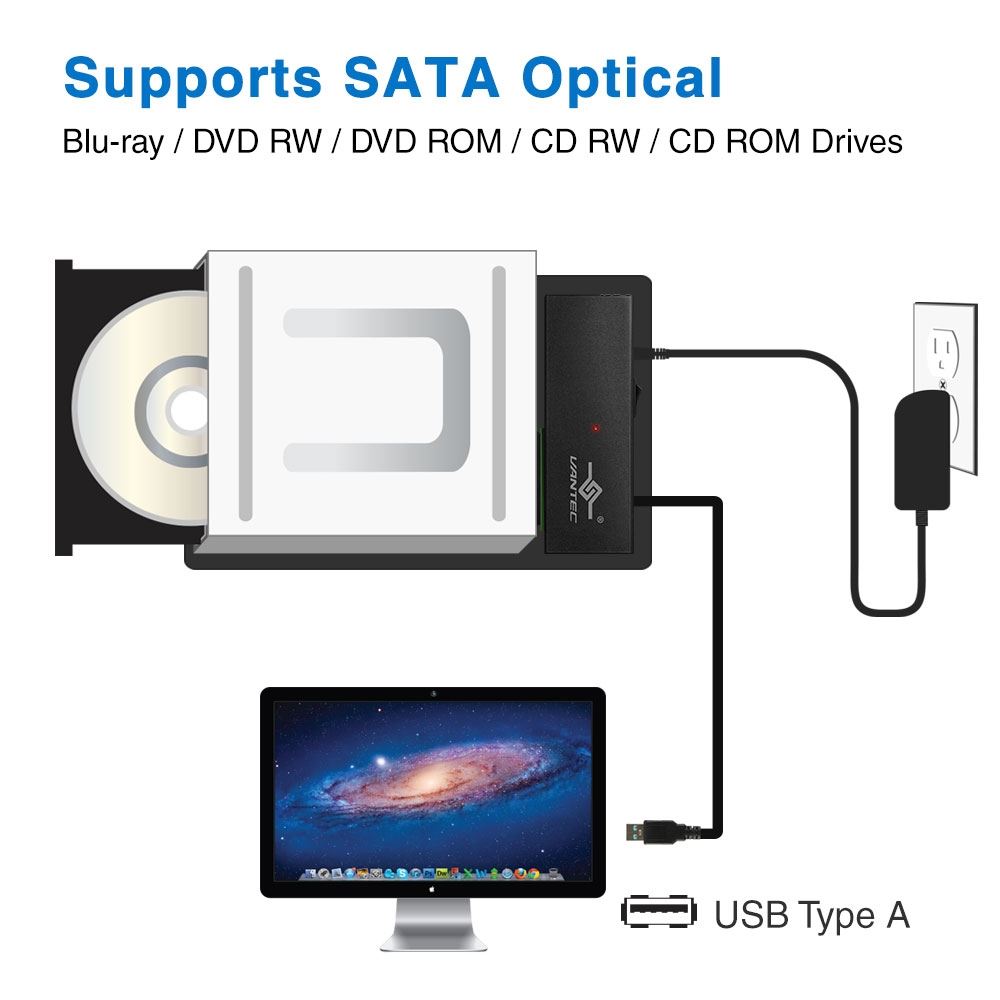
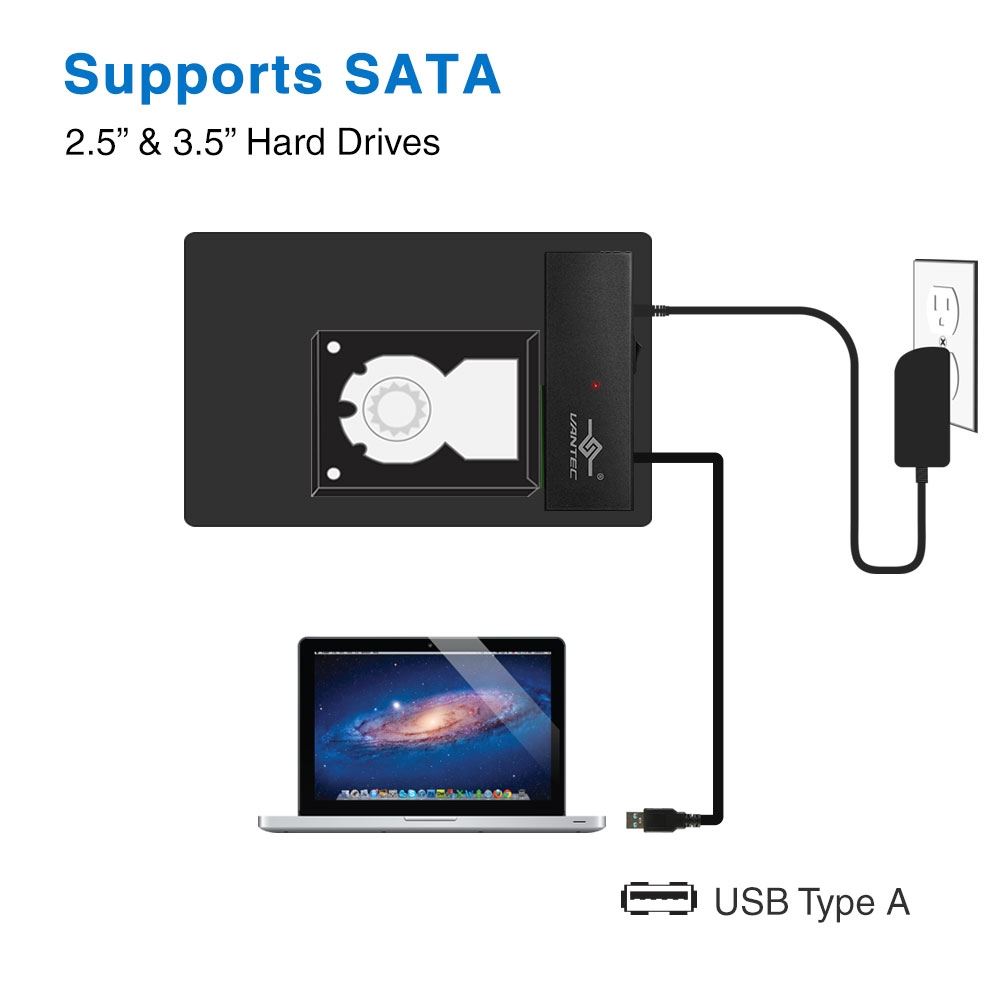

The NexStar USB 3.0 to SATA 6Gbps Optical/Storage Adapter is a simple solution to connect any existing SATA 5.25” Optical drive to your USB port. Optical Drives like Blu-Ray, DVDRW, DVD ROM, CDRW and CD ROM are perfect companion with this adapter. It is as simple as connecting up the unit to the adapter, power it ON and you have access to your Optical drive. You can even use this adapter for any 2.5”/3.5” SATA SSD/HDD and it will run at screaming speed with UASP support. This Optical/Storage adapter is perfect for any bare SATA storage drives that you like to get it connected.
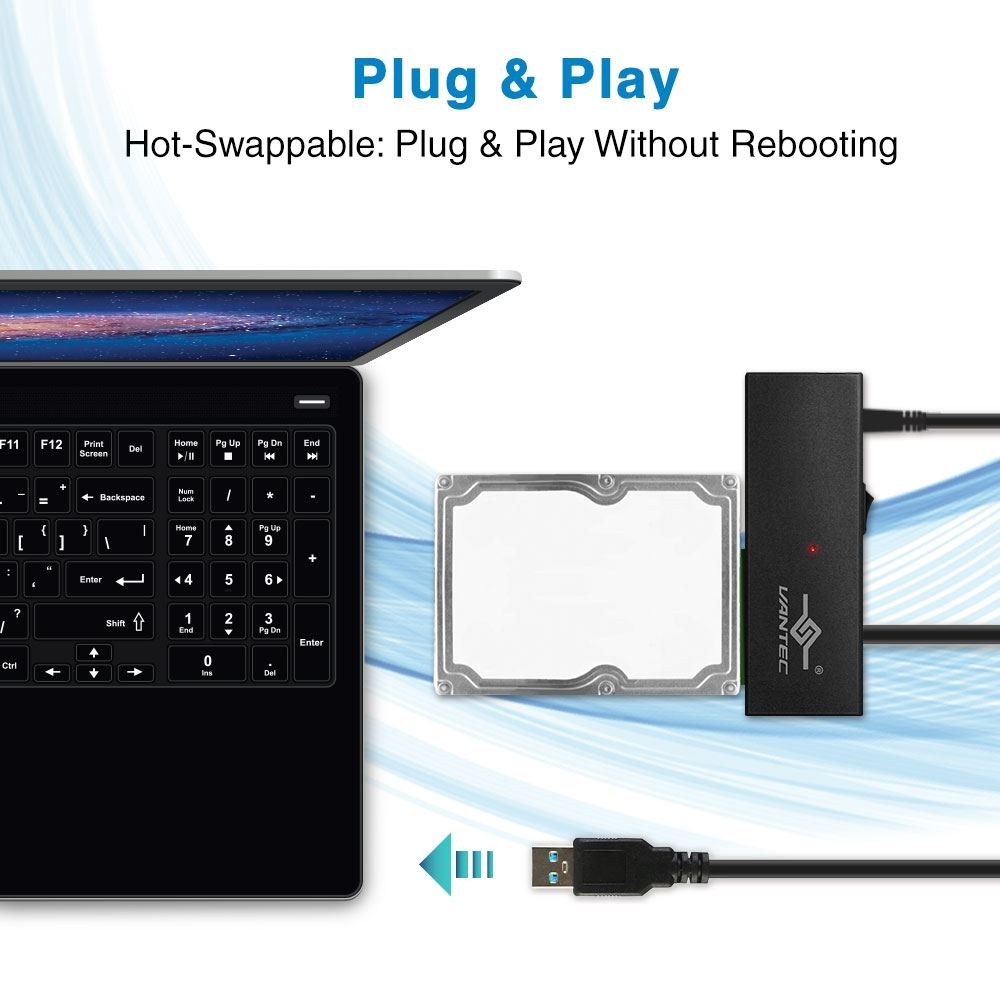
This is a perfect tool for quick Plug and Play, hot-swapped between drives without opening your case, “NDN” (No Drivers Needed), and it works with common OS like Windows/OS X/Linux. This compact and lightweight design makes for easy storage and portability.

Model: CB-ST00U3
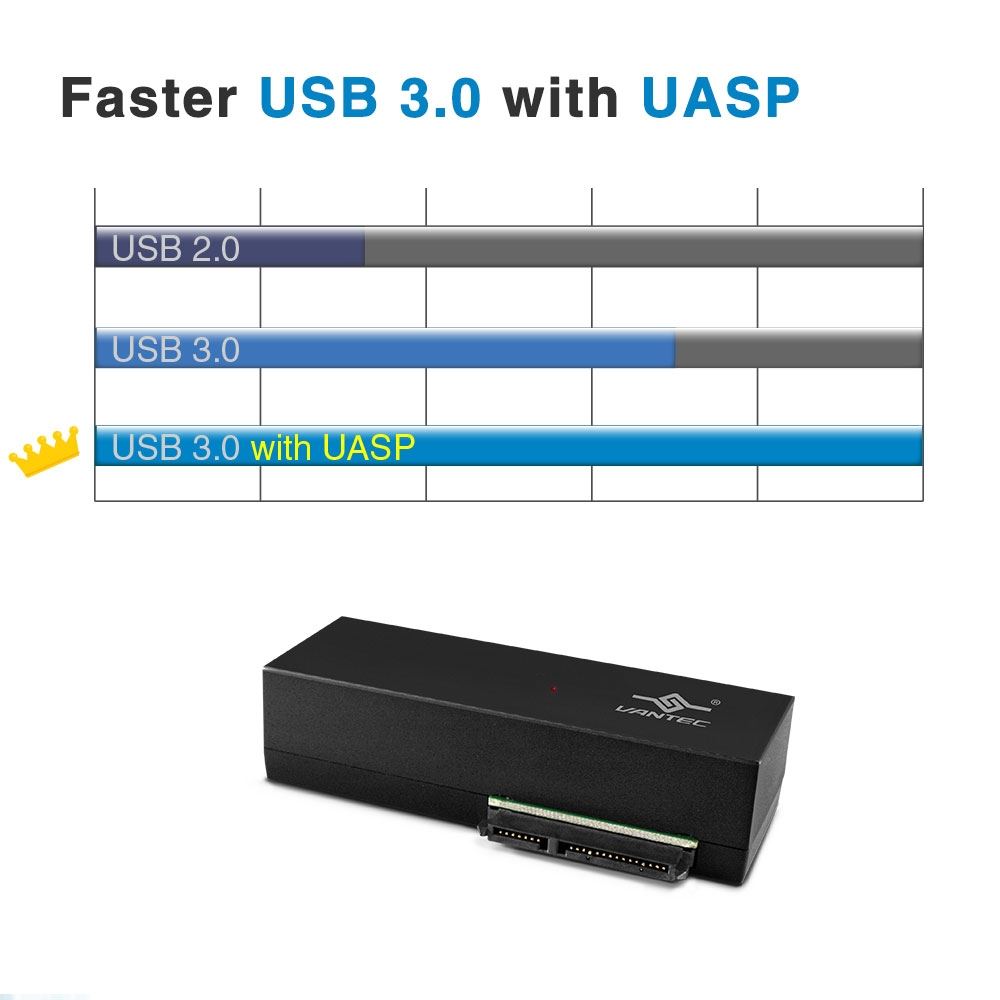
Interface: USB 3.0
Supported Devices: SATA Blu-ray/DVDRW/DVD ROM/CDRW/CD ROM, SSDs, Hard Drives
HDD Capacity: Maximum capacity, Check www.vantecusa.com for the latest update on capacity
Drive Size: 5.25”, 3.5", and 2.5"
Power Supply: 12V, 2A AC Adapter **
Dimension: 3.9 x 1.0 x 1.7 in / 100 x 25 x 43 mm
Cable Length: 18 in /457 mm (Type A to Type B)
Weight: 3 oz / 85 g
** Note: If your Optical drive requires more power, you need a bigger ac adapter.
System Requirements:
Microsoft Windows 7/ 8.1/ 10
Mac OS X 10.6 and above
Linux OS
What's included: NexStar USB 3.0 to SATA 6Gbps Optical/Storage Adapter, USB cable, Power Adapter, Anti-slip Mat (for dampening drive noise), Quick installation Guide
UPC: 844767022703
EAN: 4716872103096
There are two set of instruction. One for Windows OS and another for OS X. Please use the right set of instruction for your System.
>>>>>> 1) Preparing a new hard drive for use with Windows 7/8/10 OS <<<<<<
NOTE: If you have important data on this drive, DO NOT go any further, please backup your data before you continue. These steps will erase ALL your data on the drive.
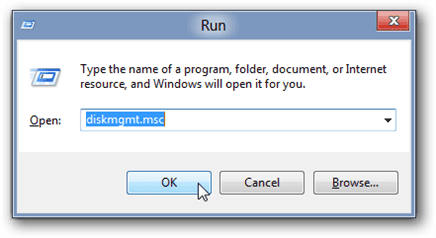
For Windows 7, hold the Windows logo key on your keyboard and press “R” (Winkey+R). This will launch the Run the utility. Type “diskmgmt.msc” inside the text box and press Enter. This will open the Windows Disk Management utility. This is where you can format, create, and delete hard drive partitions.
For Windows 8/8.1/10, hold the Windows logo key on your keyboard and press “X” (Winkey+X). This will launch a popup window and select disk management.
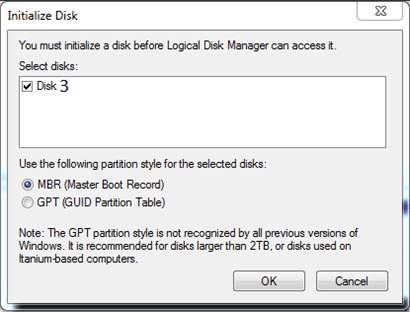
Usually, the Initialize Disk Wizard will appear automatically when you open Disk Management. If you have more than one blank drive that needs to be initialized it will list them. Make sure that there is a check in the box of the drive that needs to be initialized, select check MBR if your hard drive is smaller than 2TB, if it is greater than 2TB, please check GPT and then left-click on the Ok button. If the wizard does show up, go to step 5. If the wizard does not show up, please see the note and additional images directly below.
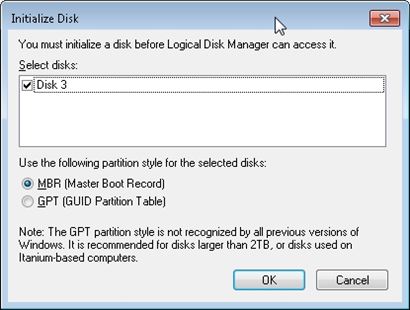
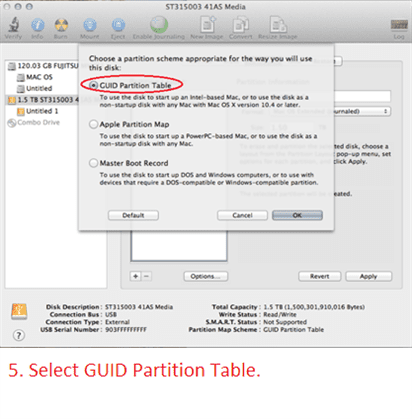
 Critical: If your hard drive is greater than 2TB in capacity, you need to use check GPT(GUID Partition Table), if it is smaller, select MBR.
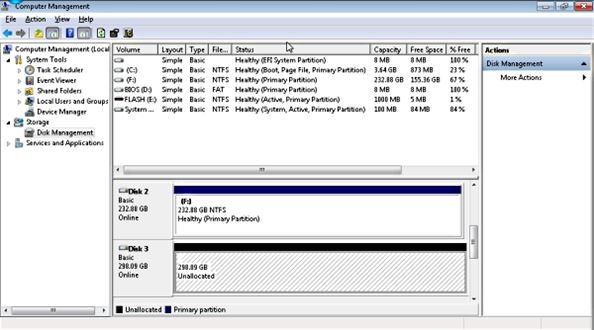
 Note: If you do not see the Initialize Disk wizard, manually start the initialization. The drive that needs to be initialized should have a little circle with a red arrow pointing down like in the image below.
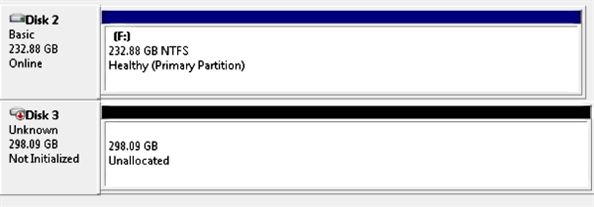
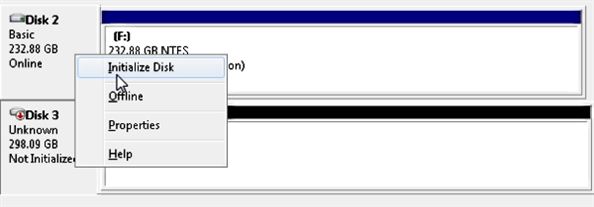
When you find it. Right-click on the red arrow and choose Initialize Disk.
There are two mode of initializing a new drive using MBR or GPT. If your hard drive is greater than 2TB, you need to use check GPT, if it is smaller, select MBR.
The drive is now initialized. The disk should have a black bar and say that it is Unallocated. You should now be able to create a partition and format the hard drive.
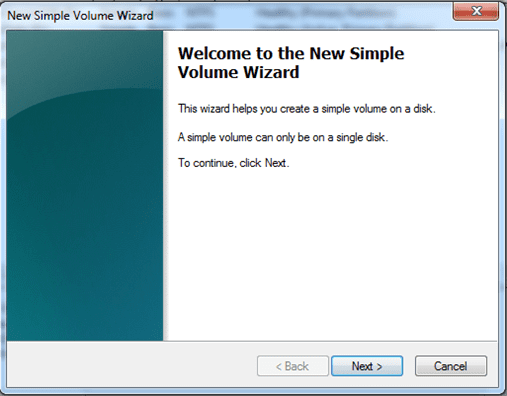
Now right click the unallocated space and click create a New Simple Volume shown below:

Follow the on screen wizard by clicking Next
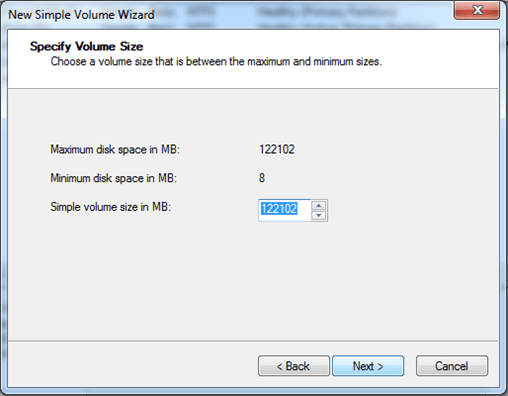
Specify your volume size, if you are not sure use the default, and now click Next
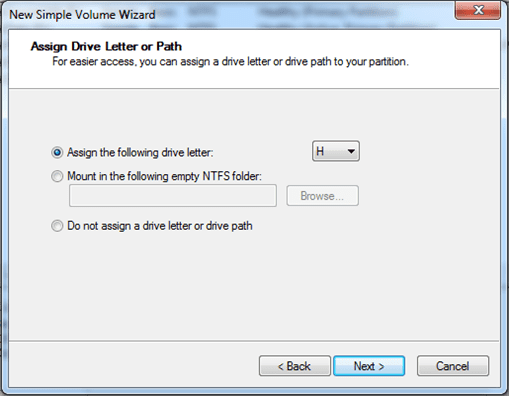
Assign a drive letter to the drive, if you are not sure use the default and click Next
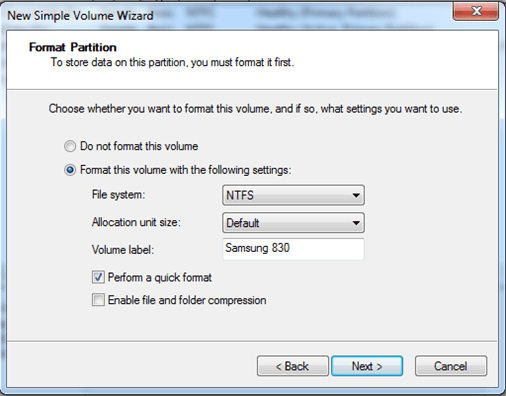
Format the partition and name the volume, if you are not sure use the default
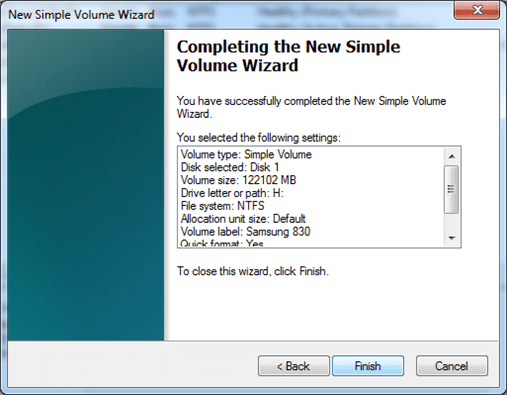
Now click Finish and it will start formatting the drive to get it ready for use.
Once the formatting is done, your system will report the presense of a new drive with an assigned drive letter. You can begin using the storage.
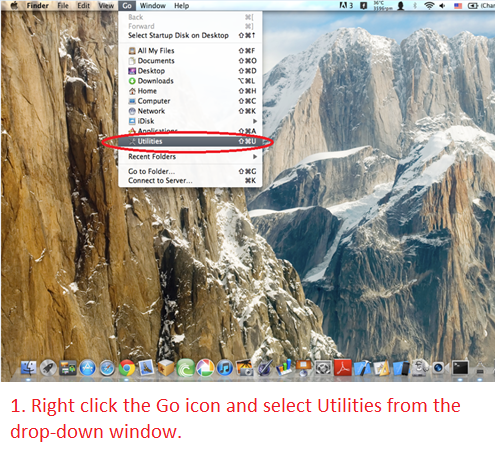
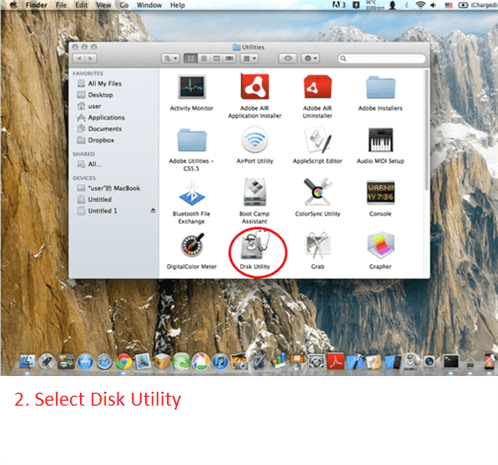
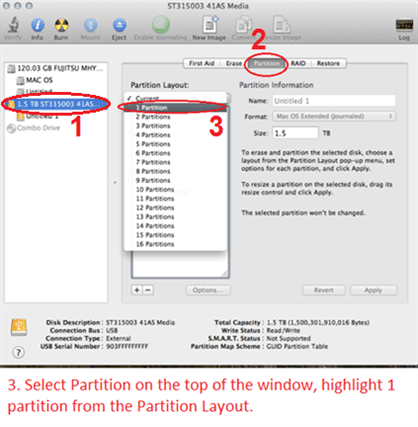
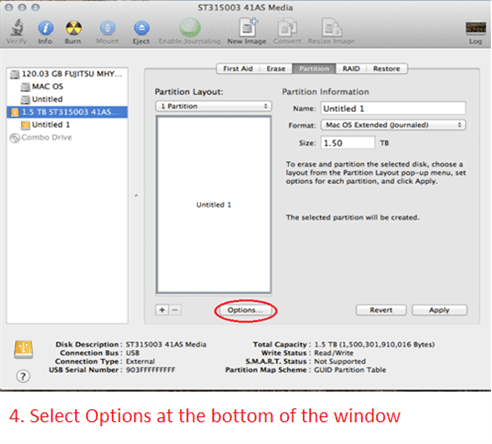
>>>>>> 2) Preparing a new hard drive for use with Apple OS X <<<<<<