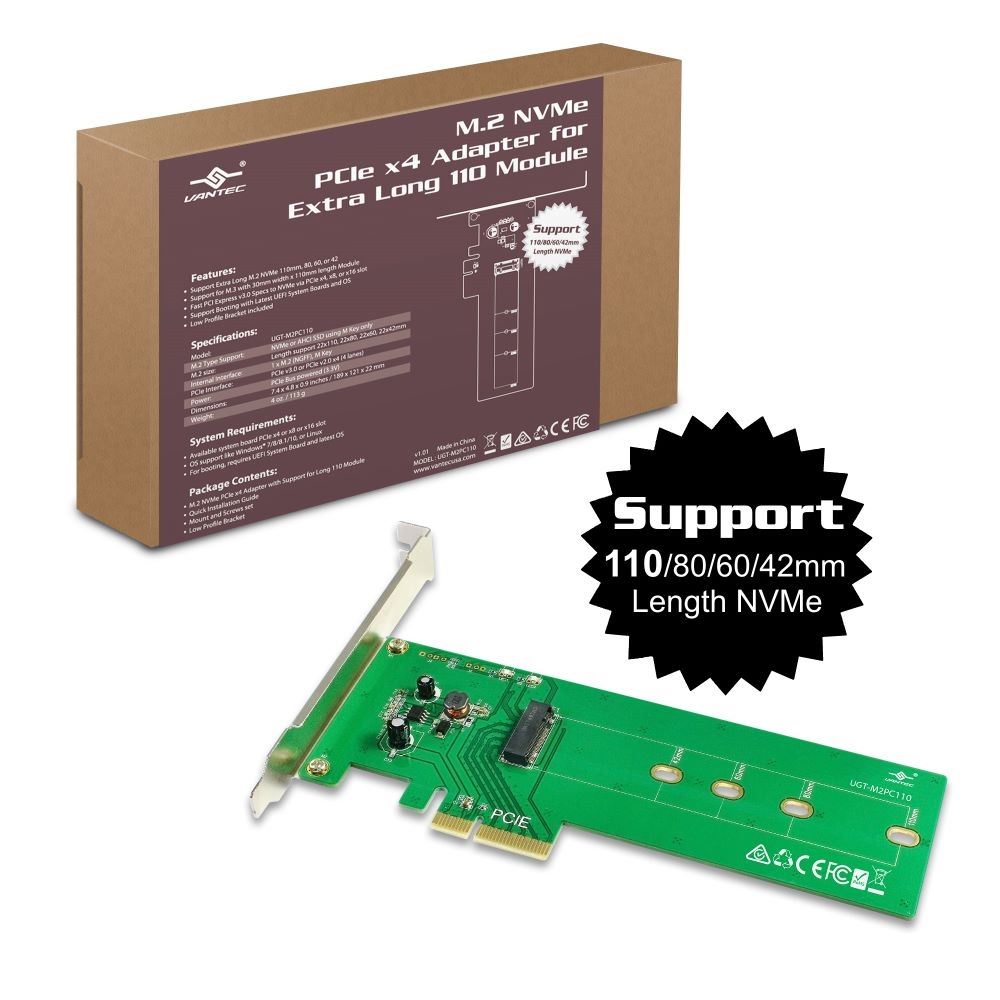
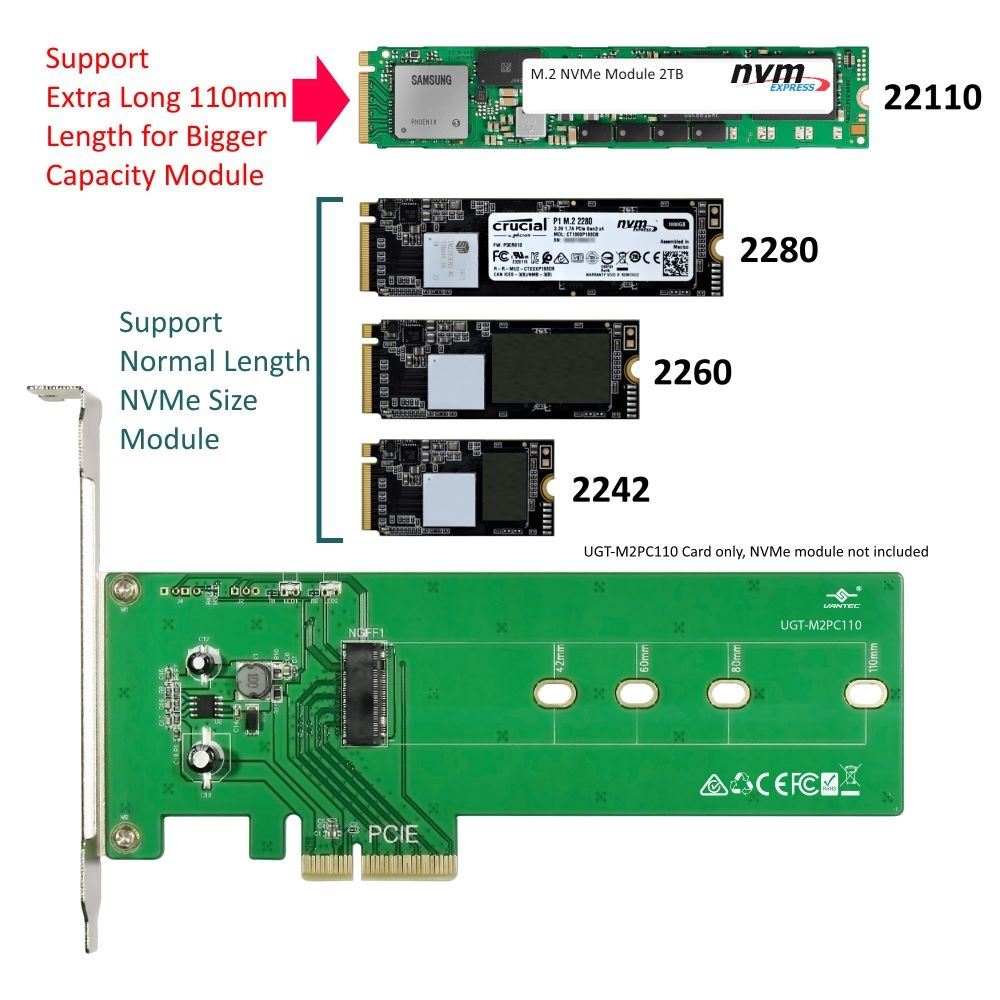
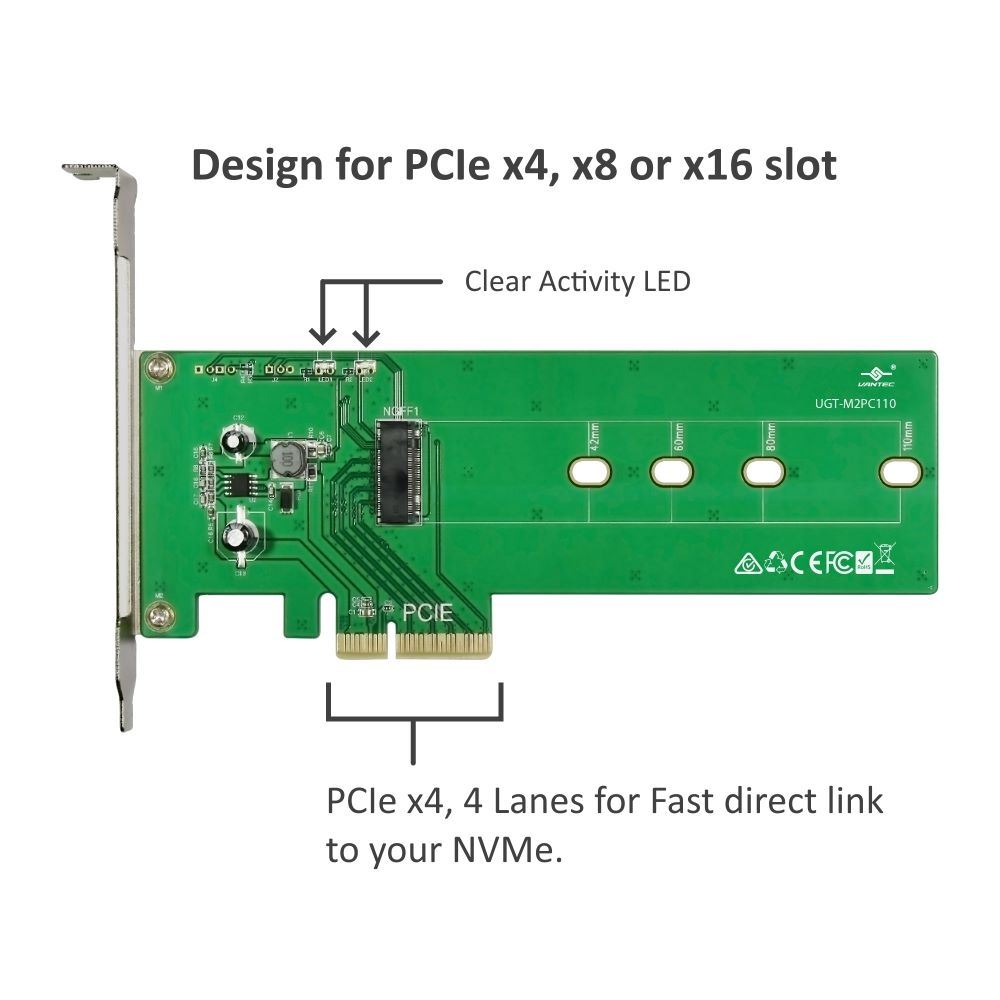

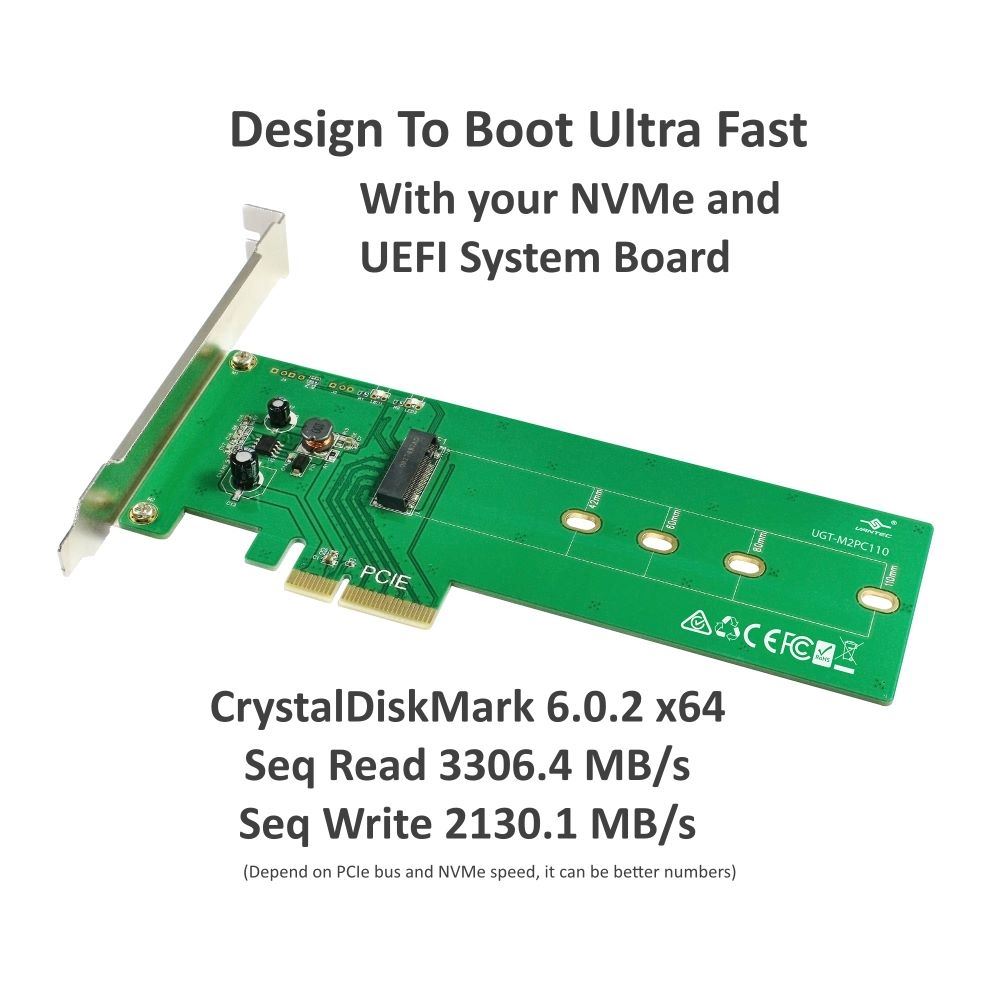
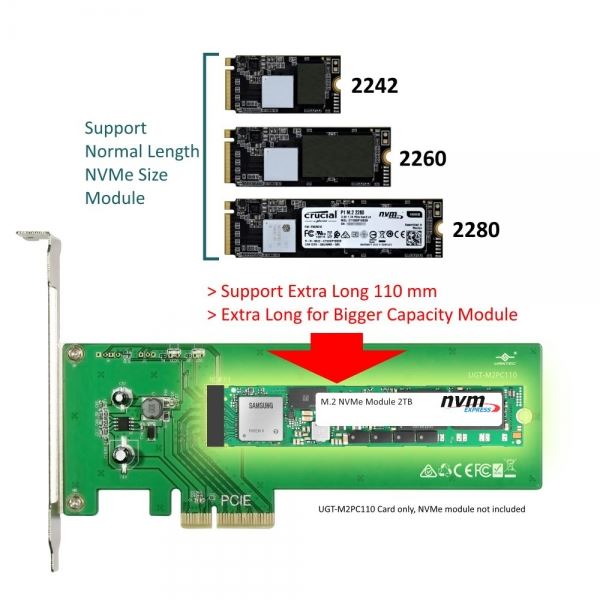
This M.2 NVMe SSD PCIe x4 Adapter can support module of different size from 42mm to the Extra Long 110mm. It offers the fastest boot or data access possible via the PCIe interface using 4 lanes of data path straight to the NVMe SSD resulting in super-fast data transfer. This adapter allows for flexible installation of an M.2 (NGFF) NVMe or PCIe AHCI SSD of different size like 42, 60, 80, or 110mm in length with varying and ever growing capacity. This M.2 adapter will give you the best performance possible for your system.

When adding or removing the card (PCI or PCIe), please ground yourself so that you do not carry any static electricity.
When you are working on a computer system, the design of the system power supply is always ON and that includes the motherboard and many of the component on the motherboard like the PCIe bus and USB ports. Unless you physically unplug the power cord from your wall outlet, these power supply will continue to power the motherboad and inserting the the addon card into a live slot may short the card and not function correctly.
Here are the steps to correctly install an addon card:
1. The first step is to know what you need and get all the necessary component ready.
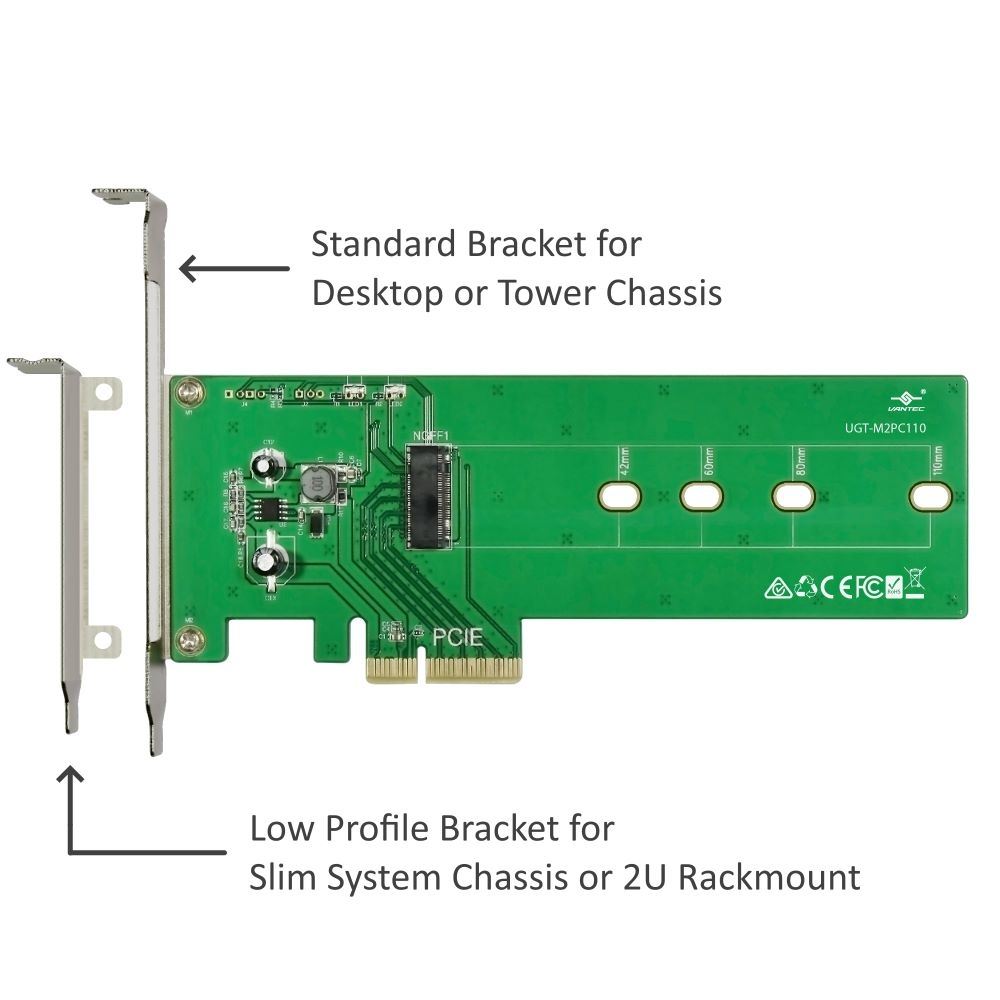
2. If your system chassis is a slim chassis design, your will need to replace the metal bracket with a low profile bracket.
Follow the PCIe card quick installation guide on replace the standard bracket with a low profile bracket before you continue to the next step.
3. Shutdown your system and turn off the power. Important: Unplug the power cord that goes from the computer to the wall outlet or your power strip and wait for 1 whole minute for your system board to be fully discharge of any residue power.
4. Remove cover of the system to access the slot on the motherboard.
5. If your system have L bracket covering the slot. Get ready to remove one of them that align with the slot you are going to insert the add-on card.
6. Most motherboard have a few slots. They may be PCI or PCIe slot. If you are install a PCIe card, find a PCIe slot that is equal or bigger than your card.
example: If you are installing a PCIe x1 card, it can be inserted into x1, x4, x8, x16 slot. But if you are installing a x4 card, it will have to go into a x4, x8, x16 slot.
See example below.

7. Remove the L bracket align with the slot that you are going to inserted and insert the new add-on card into the slot.
8. Secure the card to the chassis using the instruction provided by the chassis manufacturer.
9. (Optional) If the add-on card requires additional connection for power like 4 pin molex or SATA power connector, get the connect from the power supply and connect to the card.
10. Replace the chassis cover and secure the screws holding the cover.
11. Connect back the power cord and turn the power back ON for the system.
12. Follow the instruction from the add-on card install guide to continue the installation process.
There are two set of instruction. One for Windows OS and another for OS X. Please use the right set of instruction for your System.
>>>>>> 1) Preparing a new hard drive for use with Windows 7/8/10 OS <<<<<<
NOTE: If you have important data on this drive, DO NOT go any further, please backup your data before you continue. These steps will erase ALL your data on the drive.
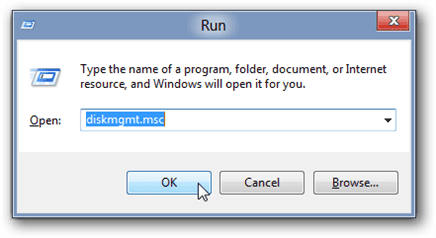
For Windows 7, hold the Windows logo key on your keyboard and press “R” (Winkey+R). This will launch the Run the utility. Type “diskmgmt.msc” inside the text box and press Enter. This will open the Windows Disk Management utility. This is where you can format, create, and delete hard drive partitions.
For Windows 8/8.1/10, hold the Windows logo key on your keyboard and press “X” (Winkey+X). This will launch a popup window and select disk management.
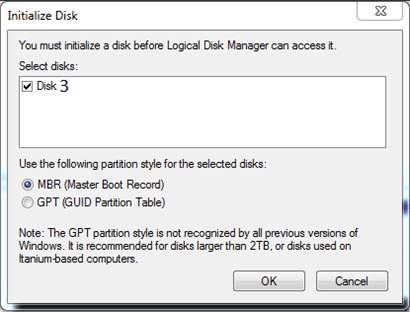
Usually, the Initialize Disk Wizard will appear automatically when you open Disk Management. If you have more than one blank drive that needs to be initialized it will list them. Make sure that there is a check in the box of the drive that needs to be initialized, select check MBR if your hard drive is smaller than 2TB, if it is greater than 2TB, please check GPT and then left-click on the Ok button. If the wizard does show up, go to step 5. If the wizard does not show up, please see the note and additional images directly below.
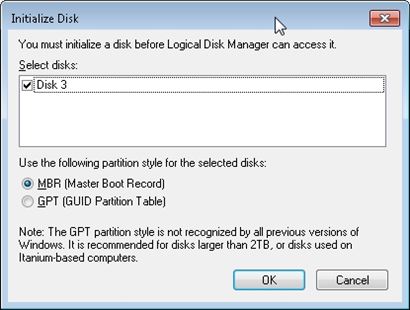
 Critical: If your hard drive is greater than 2TB in capacity, you need to use check GPT(GUID Partition Table), if it is smaller, select MBR.
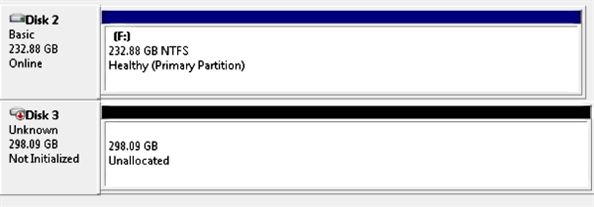
 Note: If you do not see the Initialize Disk wizard, manually start the initialization. The drive that needs to be initialized should have a little circle with a red arrow pointing down like in the image below.
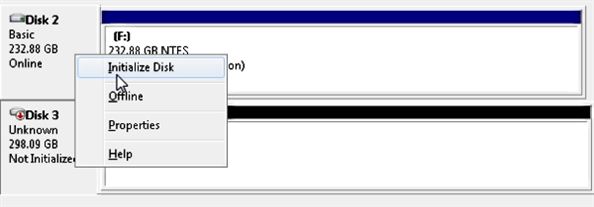
When you find it. Right-click on the red arrow and choose Initialize Disk.
There are two mode of initializing a new drive using MBR or GPT. If your hard drive is greater than 2TB, you need to use check GPT, if it is smaller, select MBR.
The drive is now initialized. The disk should have a black bar and say that it is Unallocated. You should now be able to create a partition and format the hard drive.
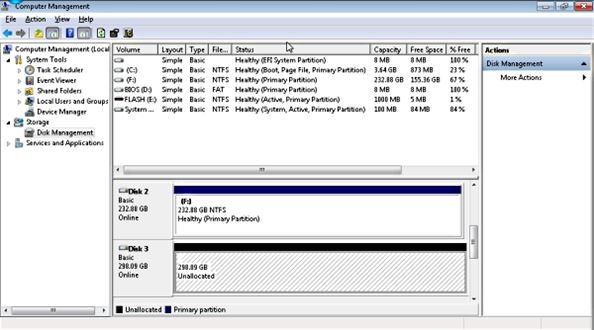
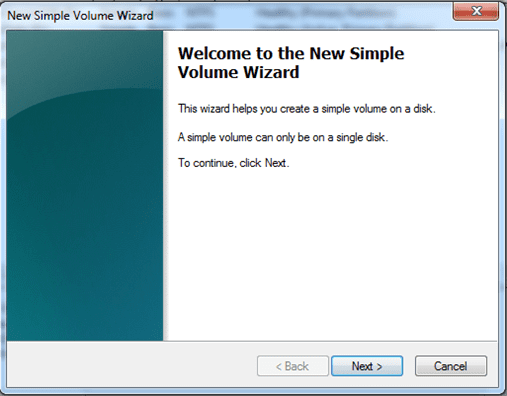
Now right click the unallocated space and click create a New Simple Volume shown below:

Follow the on screen wizard by clicking Next
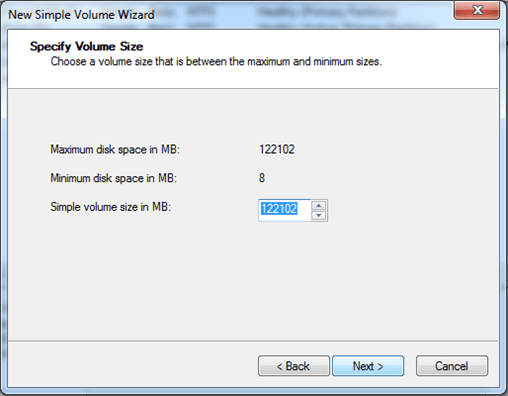
Specify your volume size, if you are not sure use the default, and now click Next
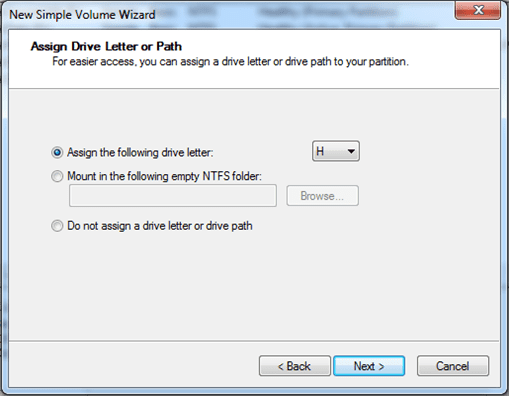
Assign a drive letter to the drive, if you are not sure use the default and click Next
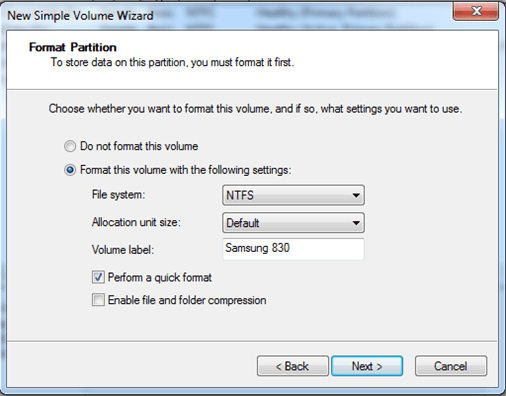
Format the partition and name the volume, if you are not sure use the default
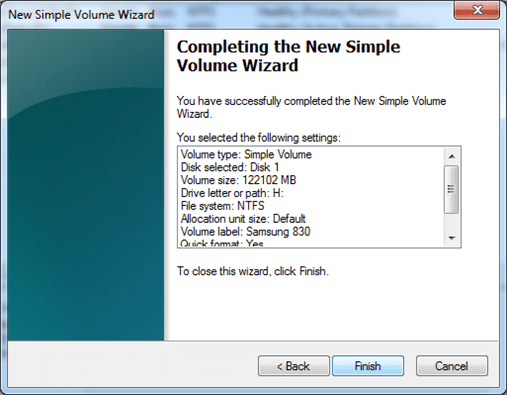
Now click Finish and it will start formatting the drive to get it ready for use.
Once the formatting is done, your system will report the presense of a new drive with an assigned drive letter. You can begin using the storage.
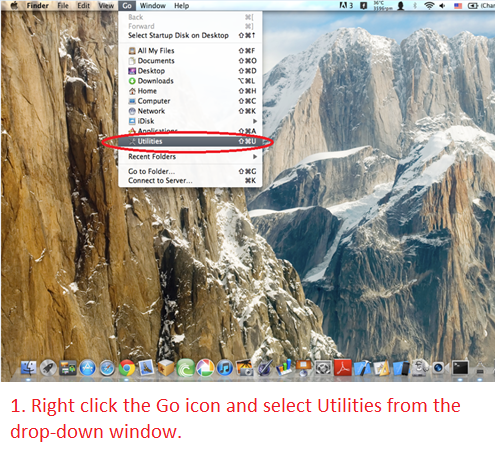
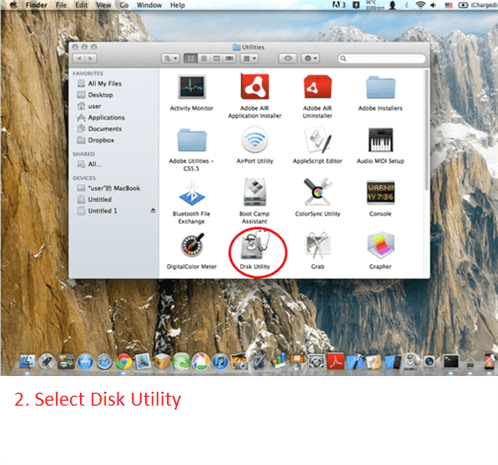
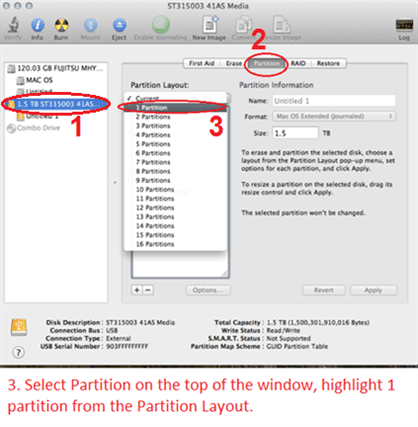
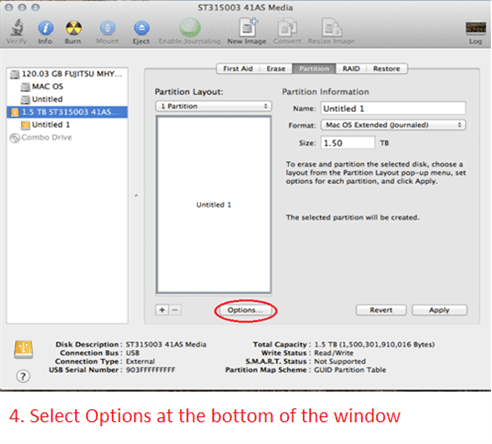
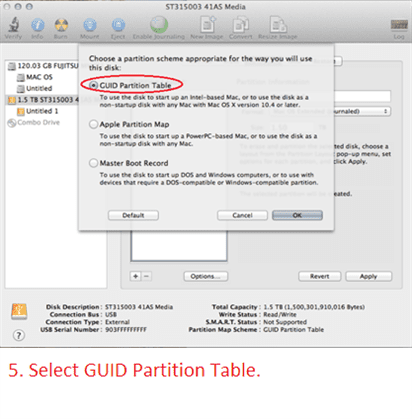
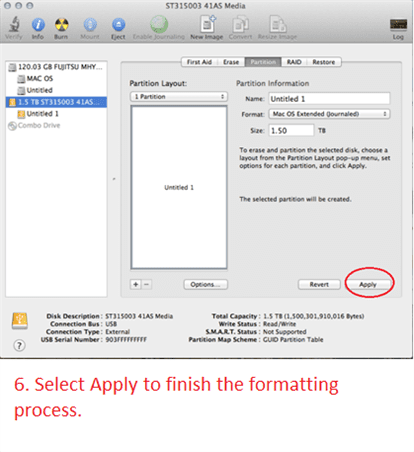
>>>>>> 2) Preparing a new hard drive for use with Apple OS X <<<<<<
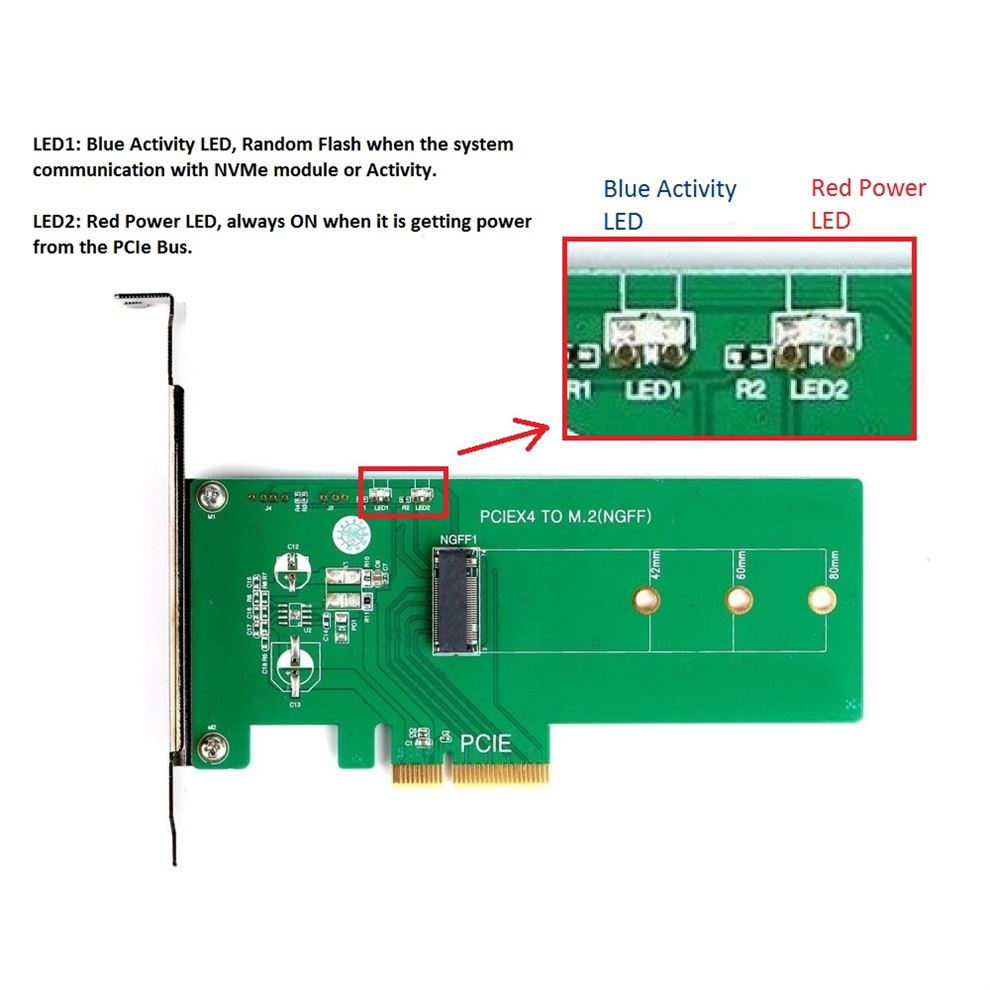
The LEDs on the card show the power and activity of the NVMe and UGT-M2PC100 / UGT-M2PC110 card.
When the card is getting power from the PCIe Bus, the Red LED2 will always be ON. If this Red LED2 is not ON, please check and reseat the card, follow the steps outline in the Knowledge Base here.
https://www.vantecusa.com/faq.php?fc_id=5
When the card is getting power (Red LED2 is ON) and the Blue LED1 is not Random flashing (activity), during boot or use, please check the NVMe module and make sure the NVMe module is seated all the way into the M.2 interface. Check for short and proper mounting of the NVMe module on to the card.